DIY Clothing Rack


Tiny closet or no closet at all? This easy (and under $100) copper rack is such a fun and functional project that will instantly give you more space, while looking stylish at the same time! With the shrinking apartments and sky-high rent around DC and NY (and the even smaller/non-existent closets), it leaves us fashionistas with few options on where to store our precious pieces. My shopping habit has gotten a bit out of control and there may never be a large enough closet to fit all of my fun and bright pieces. I know this isn't an issue that only I face since most of my friends that live in big cities have bulky, industrial clothing racks (that aren't that cute) taking up half their bedroom! Hence the inspiration for this DIY. This copper clothing rack uses simple copper materials from Home Depot for under $100!!! In addition, the size can be totally customized to fit your space. All you have to do is adjust the long pipe lengths. What could be better than that??
This clothing rack is not only functional, but it's stylish. I wanted to style it because I figured what could be prettier than a rack of colorful summer Katie Kime dresses? Copper makes the rack look so much more chic than a typical one you would find at Bed Bath & Beyond or the Container Store. Functional and FABULOUS!
What you will need:
1. (5) 1/2" x 5' pipe
2. (6) 1/2" pipe elbows
3. (2) 1/2" caps
4. (8) 1/2" tees
5. (6) 1/2" x 5" pipe (custom cut)
6. (6) 1/2" x 2" pipe (custom cut)
7. Loctite
*Home Depot will custom cut your pipes for FREE :)
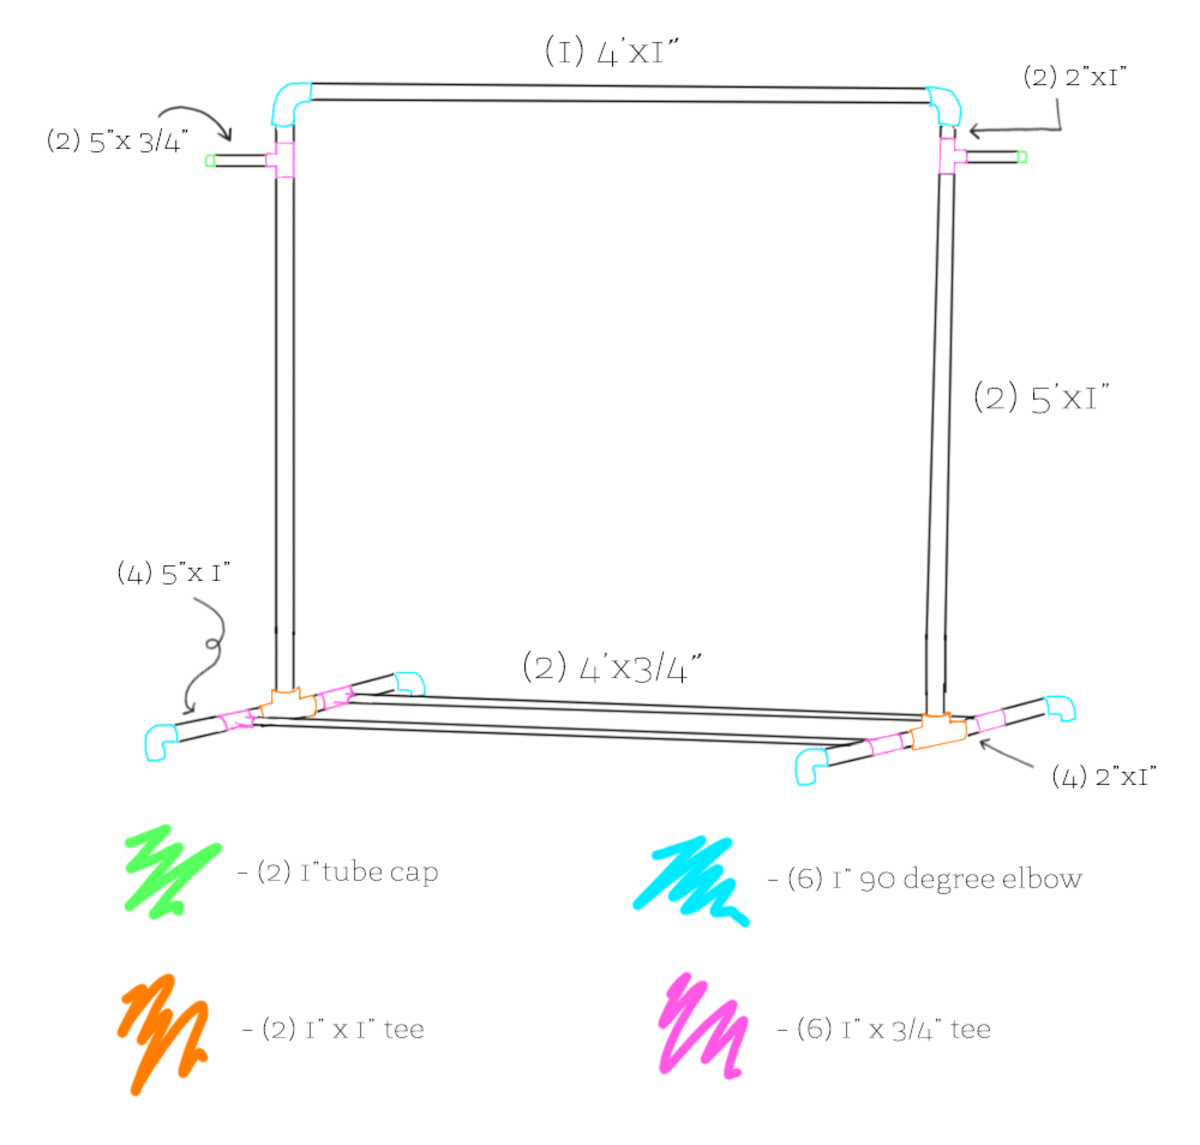
Inspiration Credit: Cupcakes & Cashmere, another amazing DIYer, originally created this DIY and put together a wonderful drawing that should help you better visualize how to assemble the rack. Please note that she uses 1" piping, whereas I used 1/2" piping.


Leave a comment